How to Apply for Aviation Jobs Like a Pro
Want to apply for jobs in less than a minute?
Is this even possible? Yes it is – and we’ve been doing it for years.
We understand your confusion though. Like you, job applications were unfamiliar to us back then when we were still fresh grads. It’s already hard enough to apply for one, let alone doing it in just 60 seconds. But trust us, it’s gonna be easy after this.
If you’re still wondering what’s the best tool to deliver your job applications in a flash, the answer is pretty simple – sending an email. Yes, most employers still prefer to receive your applications through this platform.
But sadly, 8 out of 10 Filipino AMT and AVT new grads admitted in our interviews that they don’t know how to properly communicate with employers through email.
When questioned how does this affect them, the most common responses are:
“Nag-alangan ako magpasa, kaya baka next time na lang." and
“Nag send lang ako ng resume ko, bahala na si Batman."
First of all, Batman will not rescue you from this (believe us). Second, always remember that there are 2 key factors in a successful job application email: Communicating like a professional and attaching all the required documents without taking too much time.
In this blog, we will show you how long-time Aircraft Mechanics like us do it – so you too can do it like a pro.
Here are the contents:
1.) Scan, Store, Print: Prep Your Docs
2.) How to Create a Professional Email
3.) An Email that Gets Replies (Sample Email)
#1: Scan, Store, Print: Prep Your Docs
When you’re applying for a job, an employer may want more information than just a copy of your resume. They may request some supporting documents to be attached with it.
Knowing what to include and how to prepare them beforehand will increase your chances of getting booked for an interview right away.
Here’s the list of items you might want to have before applying for jobs:
- Diploma and Transcript of Records *
- Birth Certificate *
- Valid Government ID (LTO, UMID, etc.) *
- BIR, SSS and Pag-ibig Number and ID *
- Passport *
- CAAP AMT/AMS License *
- Training/OJT Certificates **
- Any form of certifications from previous job or college **
*Strongly Recommended - Having these documents will help the employers expedite the process of your application once you are considered a candidate. This will also show recruiters that you’ve done your research and will result in a great ‘first impression.’
**Optional/If Applicable - Items that belong to this list puts you at an advantage. If you’re still a fresh grad, this is optional for you. But including them will surely boost your chances of getting hired in so many ways.
Scan, Store, Print
Access to your documents is crucial, especially when trying to apply for multiple jobs at a time. Losing any of these personal items will cost you a lot of time, and maybe worse – an opportunity. So stay ready and be prepared by following these simple methods.
Step 1: Scan it.
After acquiring any important documents, the best thing to do first is to scan them (not taking a picture, making a photocopy, nor putting it in a frame – scan it). This will provide you with the clearest copy of the documents and ensures that you’ll never run out of copies whenever you need them again.
The only problem is that scanners are not easy to carry around and are not always available. Luckily, mobile apps with scanning features are just a download away. Now here are our picks of the best scanning apps for your documents:
- Adobe Scan
- Office Lens
- Genius Scan
Step 2: Store it.
Having safe storage for your important documents is almost a no-brainer. But as important as its safety is its accessibility. You must be able to access them anytime and anywhere. Here are some of our tips on how to store your files.
For original copies:
- Fireproof and Water Resistant File Folder. This may sound like an expensive purchase but this will surely help you in the long run. You must understand that getting original copies becomes harder as time goes by.
For digital copies:
- A dedicated USB or External Memory Storage. Again, spend some money on important things like documents. Always have a separate storage unit that is solely allotted for this purpose.
- Save it online. Saving your files in the ‘cloud’ lets you access them from anywhere and makes them easier to share and attach. Also, it will serve as a backup to all of your documents just in case you’ve lost the actual file.
With plenty of different options for cloud storage, it’s vital to pick a provider that will supply you with the optimal amount of storage and bandwidth, as well as keep your data safe and sound. Here’s a list we deem offer the best services:
- Google Drive (highly recommended)
- OneDrive (Microsoft)
- iCloud (Apple)
Step 3: Print it.
If you have already scanned and stored it, then it’s time to do some printing. Why do you need to print? Well, here are some obvious reasons:
- Prevent the original from getting used over and over again to produce those nasty photocopies by using the printed copy instead.
- Gives you extra copies when your originals are not available.
- Prevents damage caused by pressing on documents especially if it has features like dry seals and bar codes.
NOTE: Always remember to print a copy that matches the original’s paper size. It will also help if you can print it with the same color and contrast as the original.
NOTE: In making ID copies, always check if there is information written at the back portion. Include this on your printing and make sure they are positioned properly. Try to use a single page for every ID you print or adjust as required.
#2: How to Create a Professional Email
Email is the most common medium of communication especially in a business and professional setup. Forget about sending a text or starting a chat (unless you want to be treated as an amateur).
From choosing your email address, up to writing your closing remarks, you must be extra mindful on every part that goes into it. Don’t underestimate the power of a good email. Sometimes, it’s the only difference between getting hired and getting completely ignored.
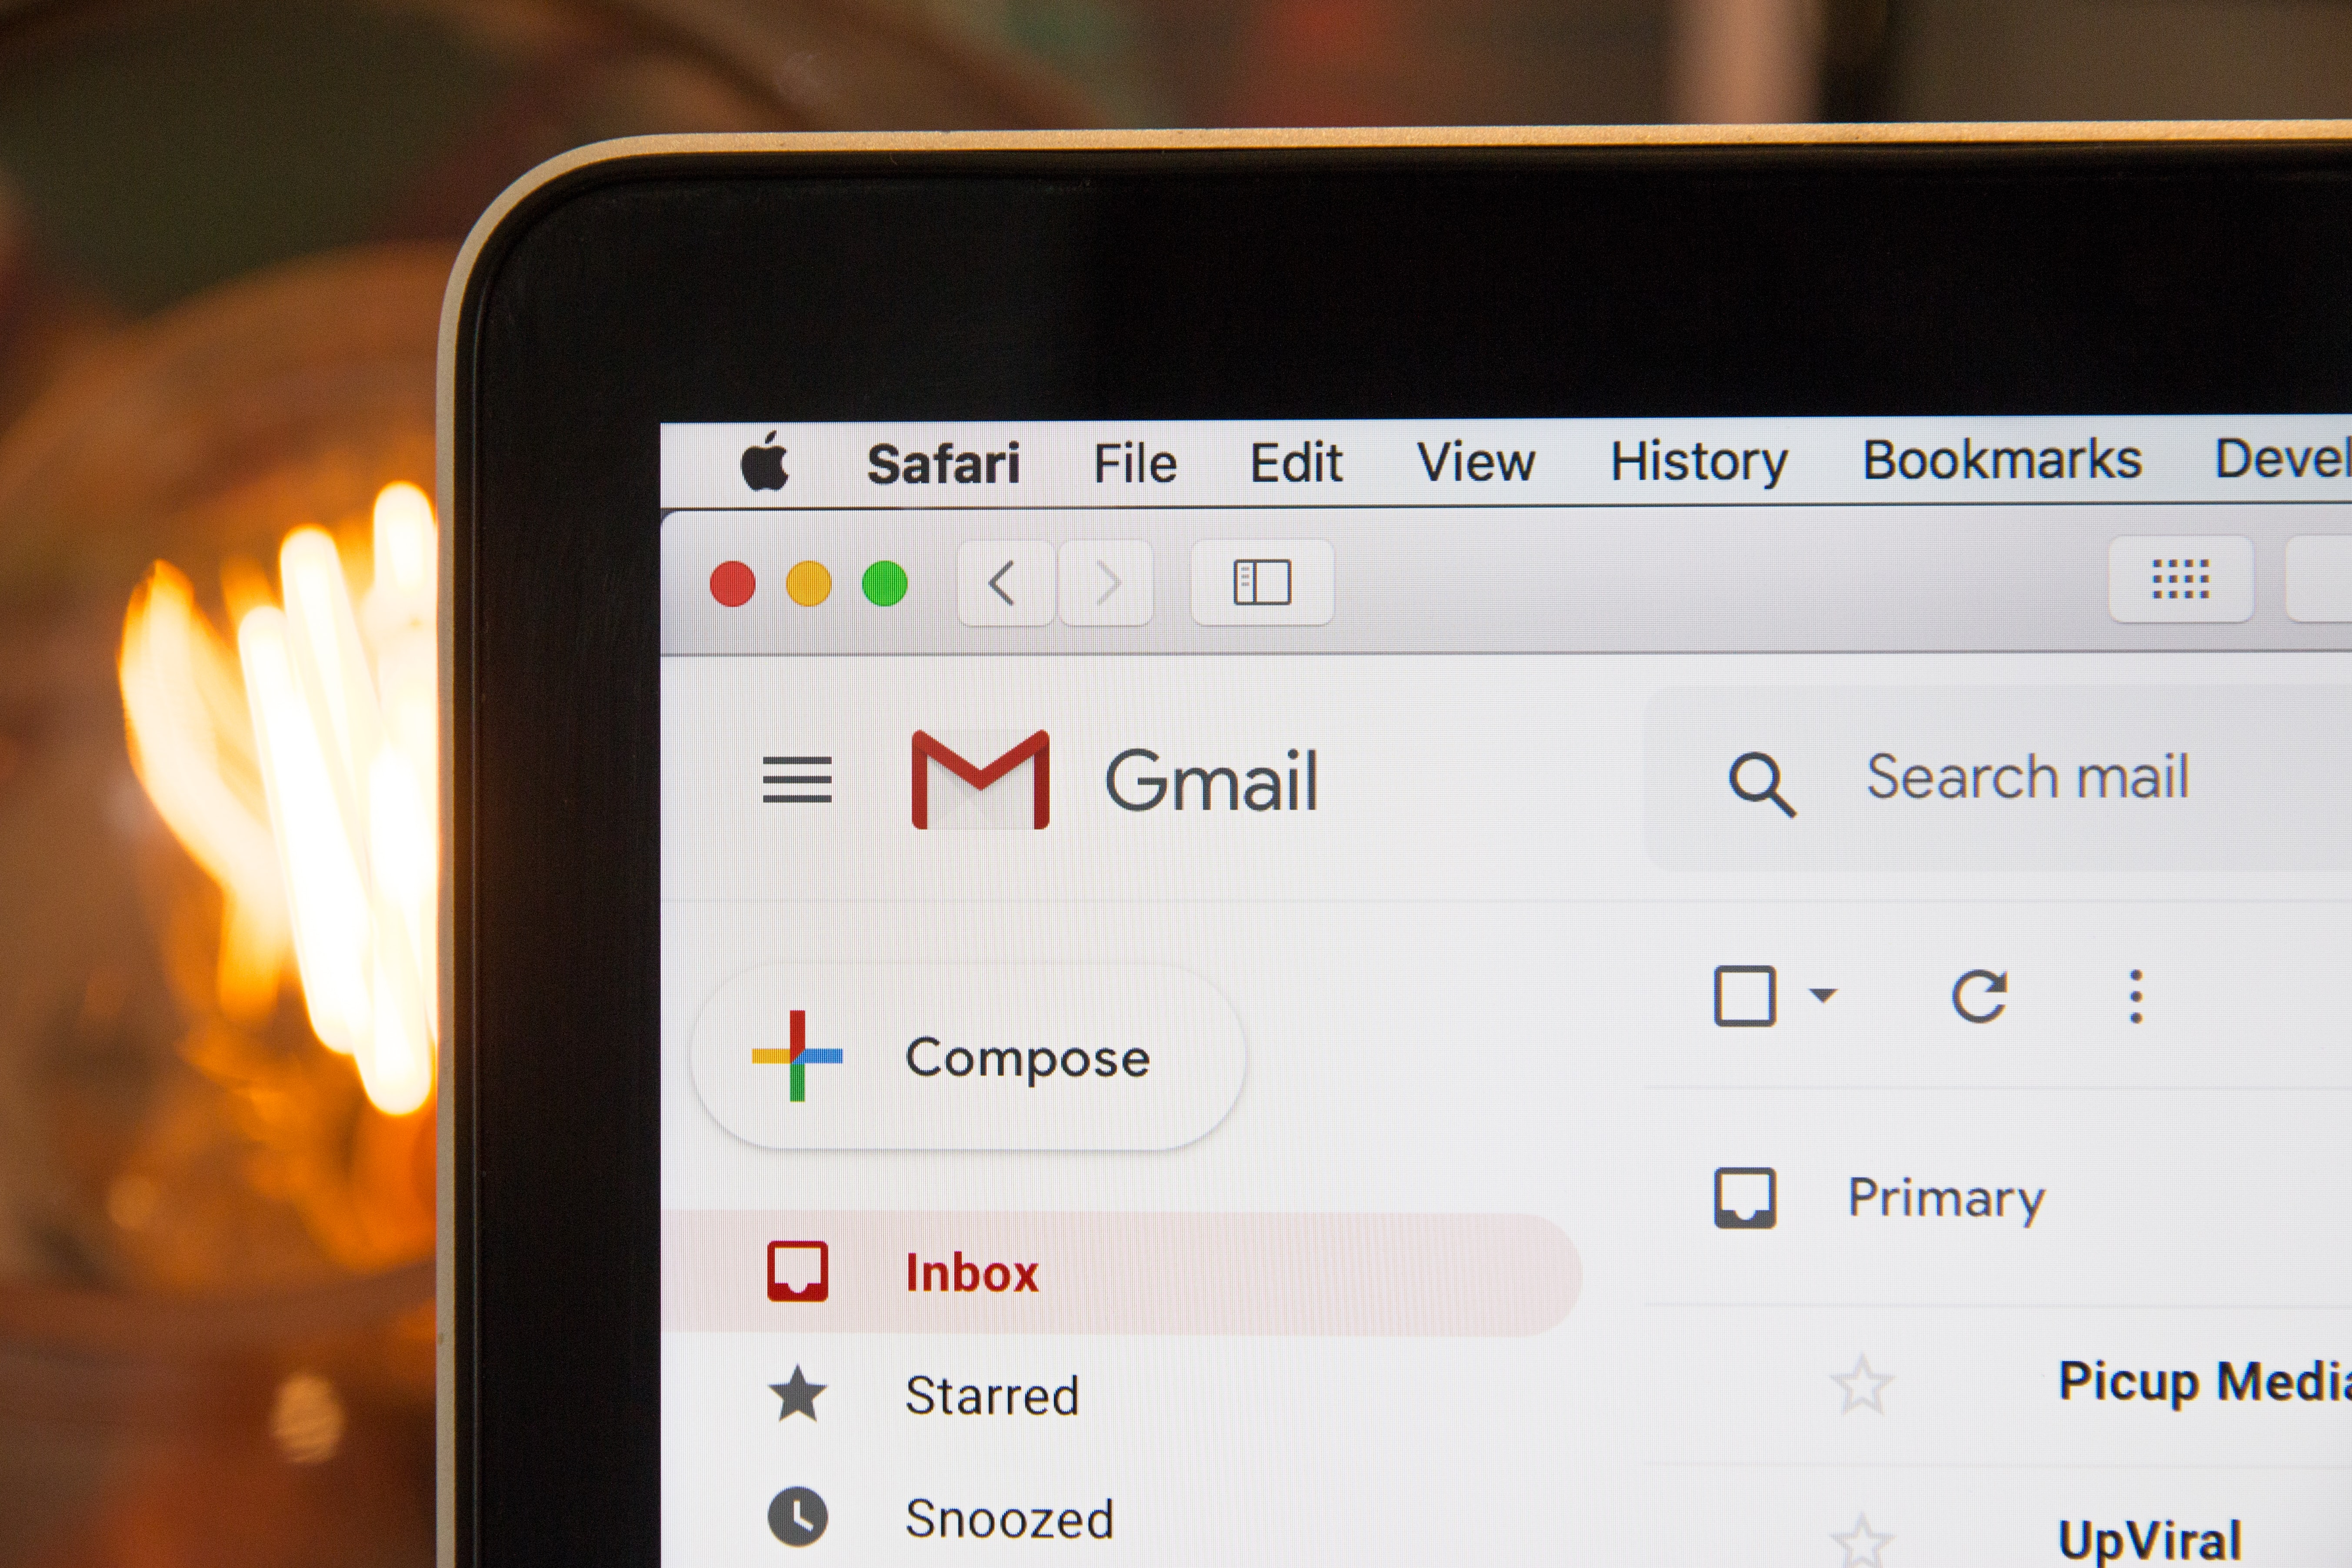
Step 1: Choose a preferred email provider.
- Gmail (most recommended) | format: example@gmail.com |
- Outlook | format: example@outlook.com |
- Apple iCloud Mail | format: example@icloud.com |
Step 2: Create your professional alias.
If you are a college student or someone who is starting their professional career, now is the right time to let go of the email address which no longer serves you, and create a new one that will serve you for the next several years. Here are some tips on how to do it.
-
Use your name. Nothing could be better than using your name as your email address.
For example: mannypacquiao@gmail.com
-
Use name abbreviation. If you have a common name, chances are high that this email address is already taken. If that’s the case, you can play around with the name order and abbreviations.
For example: mpacquiao@gmail.com
-
Use special characters. Many email service providers will let you use a few special characters like underscore (_), dashes (-), and periods (.) which can help you get your desired name.
For example: manny.pacquiao@gmail.com
-
Easy to remember. Select a username that is not only easy to remember but easy to pronounce. Since we are dealing with a personal email address, being able to easily speak it to people will be massively helpful. Challenging pronunciations and spellings are to be avoided.
For example: pacman@gmail.com
GENERAL NOTES:
- Don’t use any prefix or suffix (like cool, sweet, best, hunk, etc.) while selecting your email address. You’re not in high school anymore.
- Your email address is all about you, so don’t link your email address with the name of your boyfriend/girlfriend/dog/children/etc.
- Whenever you are creating a new email address, think of it as your online identity. Think about how it will sound in 10-15 years. Think about what it says about who you are as a person and as a professional.
Step 3: Constructing an email for your job application.
One of the most common ways to apply for jobs today is by sending an application letter via email. This is especially true for companies that still don’t use automated application systems.
Remember, your email does not have to be lengthy and complex. Follow these tips in building your next application letter.
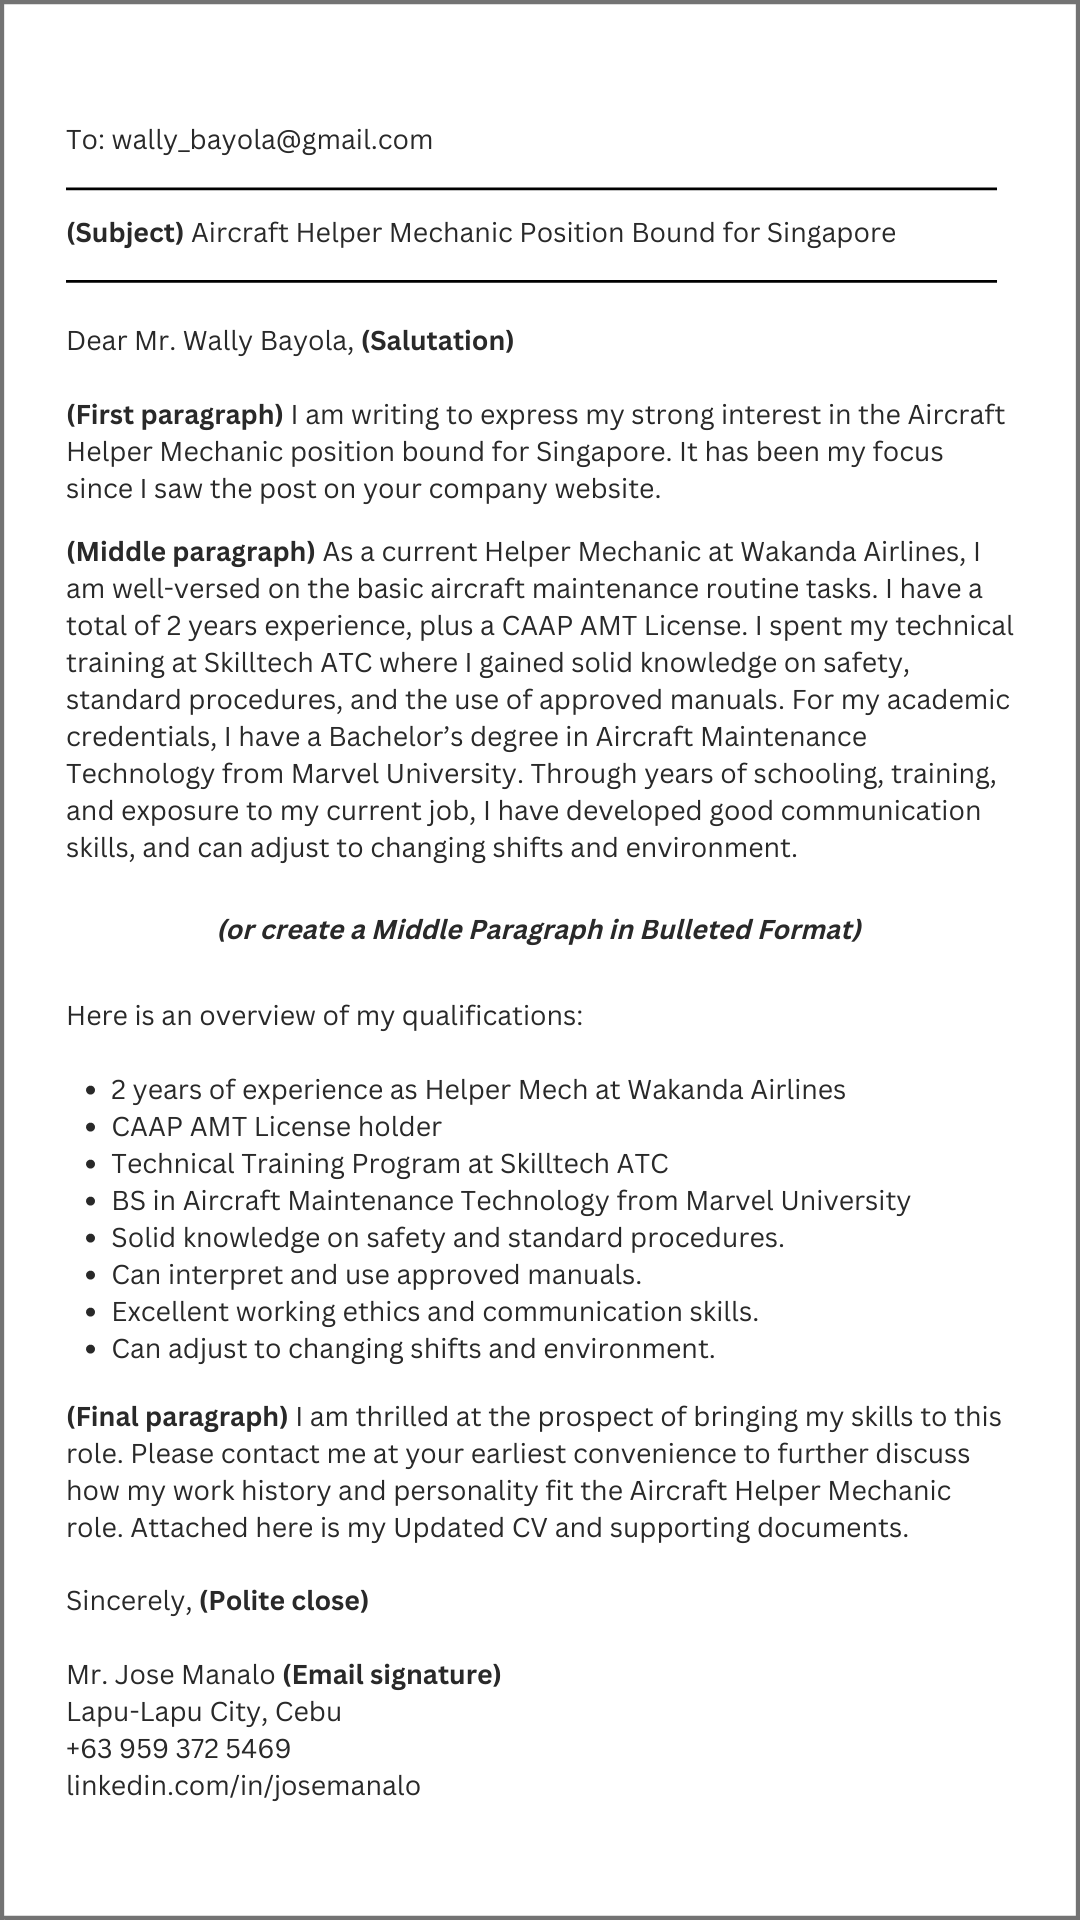
- Subject line. Since hiring managers receive a lot of emails, make it easy for them to filter application emails. Include the job title you are applying for in the message’s subject line. If a job has been assigned a country of destination, provide this as well.
- Salutation. If possible, address your email to a specific person. If a name isn’t available, you can open with, “Dear Hiring Manager.”
- First paragraph. Here, mention where you saw the job application, and how you found the posting (i.e. posted on a job search ad). If you were referred by a friend or a colleague, this portion is where you’ll put his/her name and position.
- Middle paragraphs. This is where you can make a pitch for your candidacy (i.e. “Why would you be a good fit for the job?). Highlight your most relevant experiences and responsibilities. You can also do this in a bulleted format.
- Final paragraph. Use this space to thank the recipient for reading your email, and mention that your resume is attached (add other docs as applicable). It’s also the space to thank recipients in advance for considering your application.
- Polite close. Use a polite close, such as “Best Regards” or “Sincerely," to sign off your letter.
- Email signature. You can also include your email signature, which is an easy way to provide contact information to recipients. List your name, phone number, email address, and LinkedIn profile URL (if you have one).
- Attach your resume. Use the format requested by the employer. If a specific format isn’t mentioned, send it as a PDF. Also, pay attention to the required supporting documents (i.e. passport), and don’t forget to attach them as well.
#3: An Email that Gets Replies (Sample Email)
Can you do it in less than 60 seconds?
We promised that we’ll teach you how to do it like a pro – by sending job applications in less than a minute, right? Well, now you can.
It might take a while when doing it for the first time (especially the scan-store-print). But once you’ve figured it out with the help of our examples, it will be as easy as “copy and paste” (yes, this is the secret recipe).
The copy-paste part will only take you like a second. For the remaining 59 seconds? Well, change a couple of words, attach your already-available files, and voilà! You are ready to hit send!
Try repeating this process a few times, and before you realize it –
You’re one of the pros now.
